Usage
Step 1: Open the Add-in
-
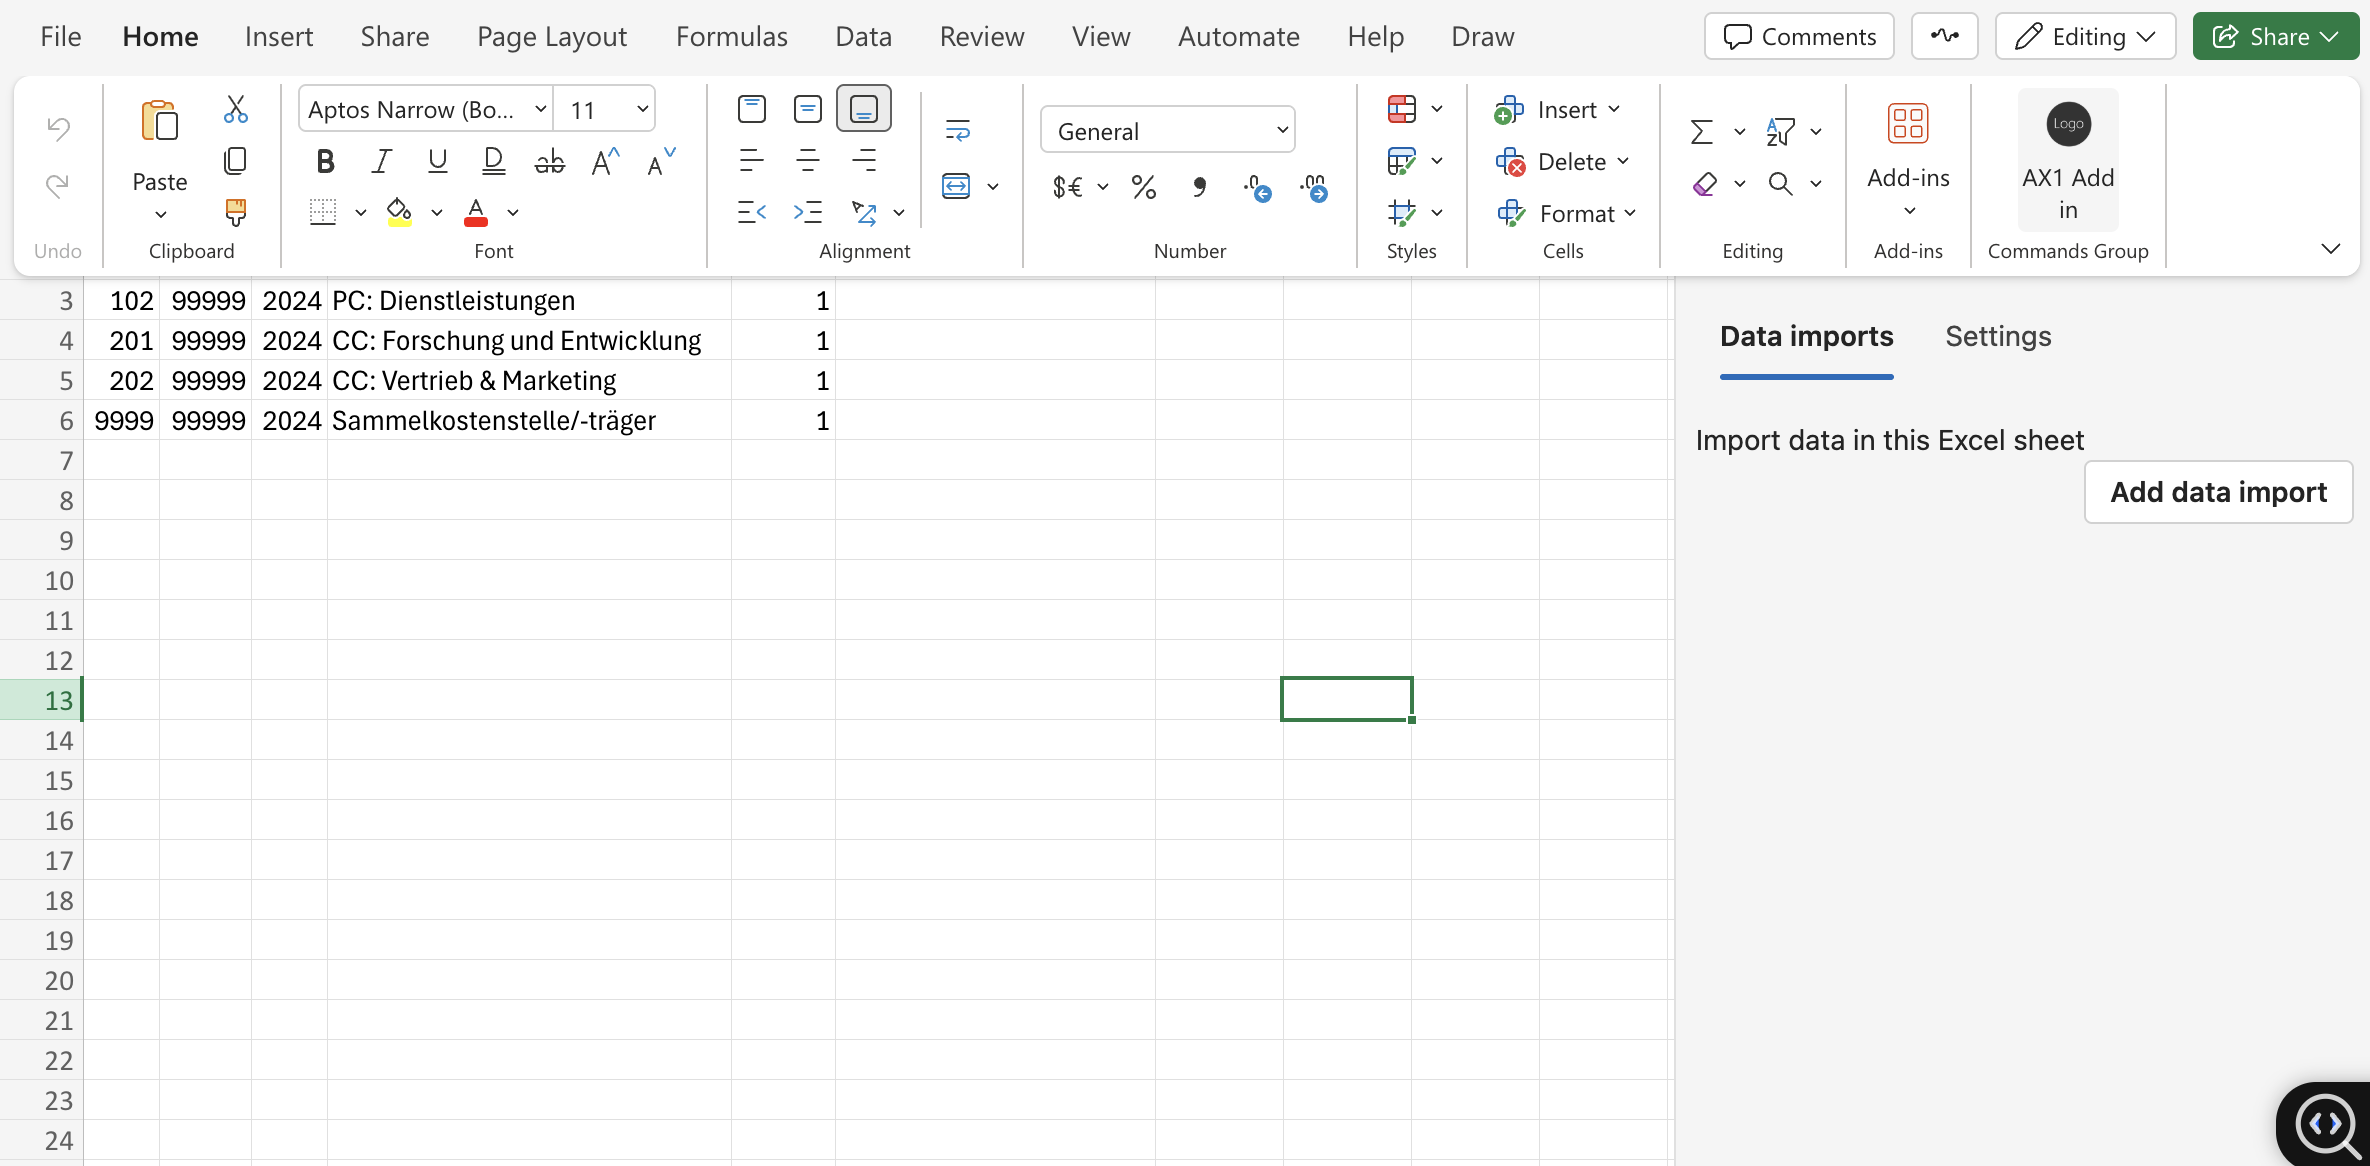
After installation, go to Home > AX1 Add in. This opens a sidebar with which you can use to install and manage data imports.
Step 2: Fetch Data
Click on Add data import to open data import form:
Fill in the form in the sidebar:
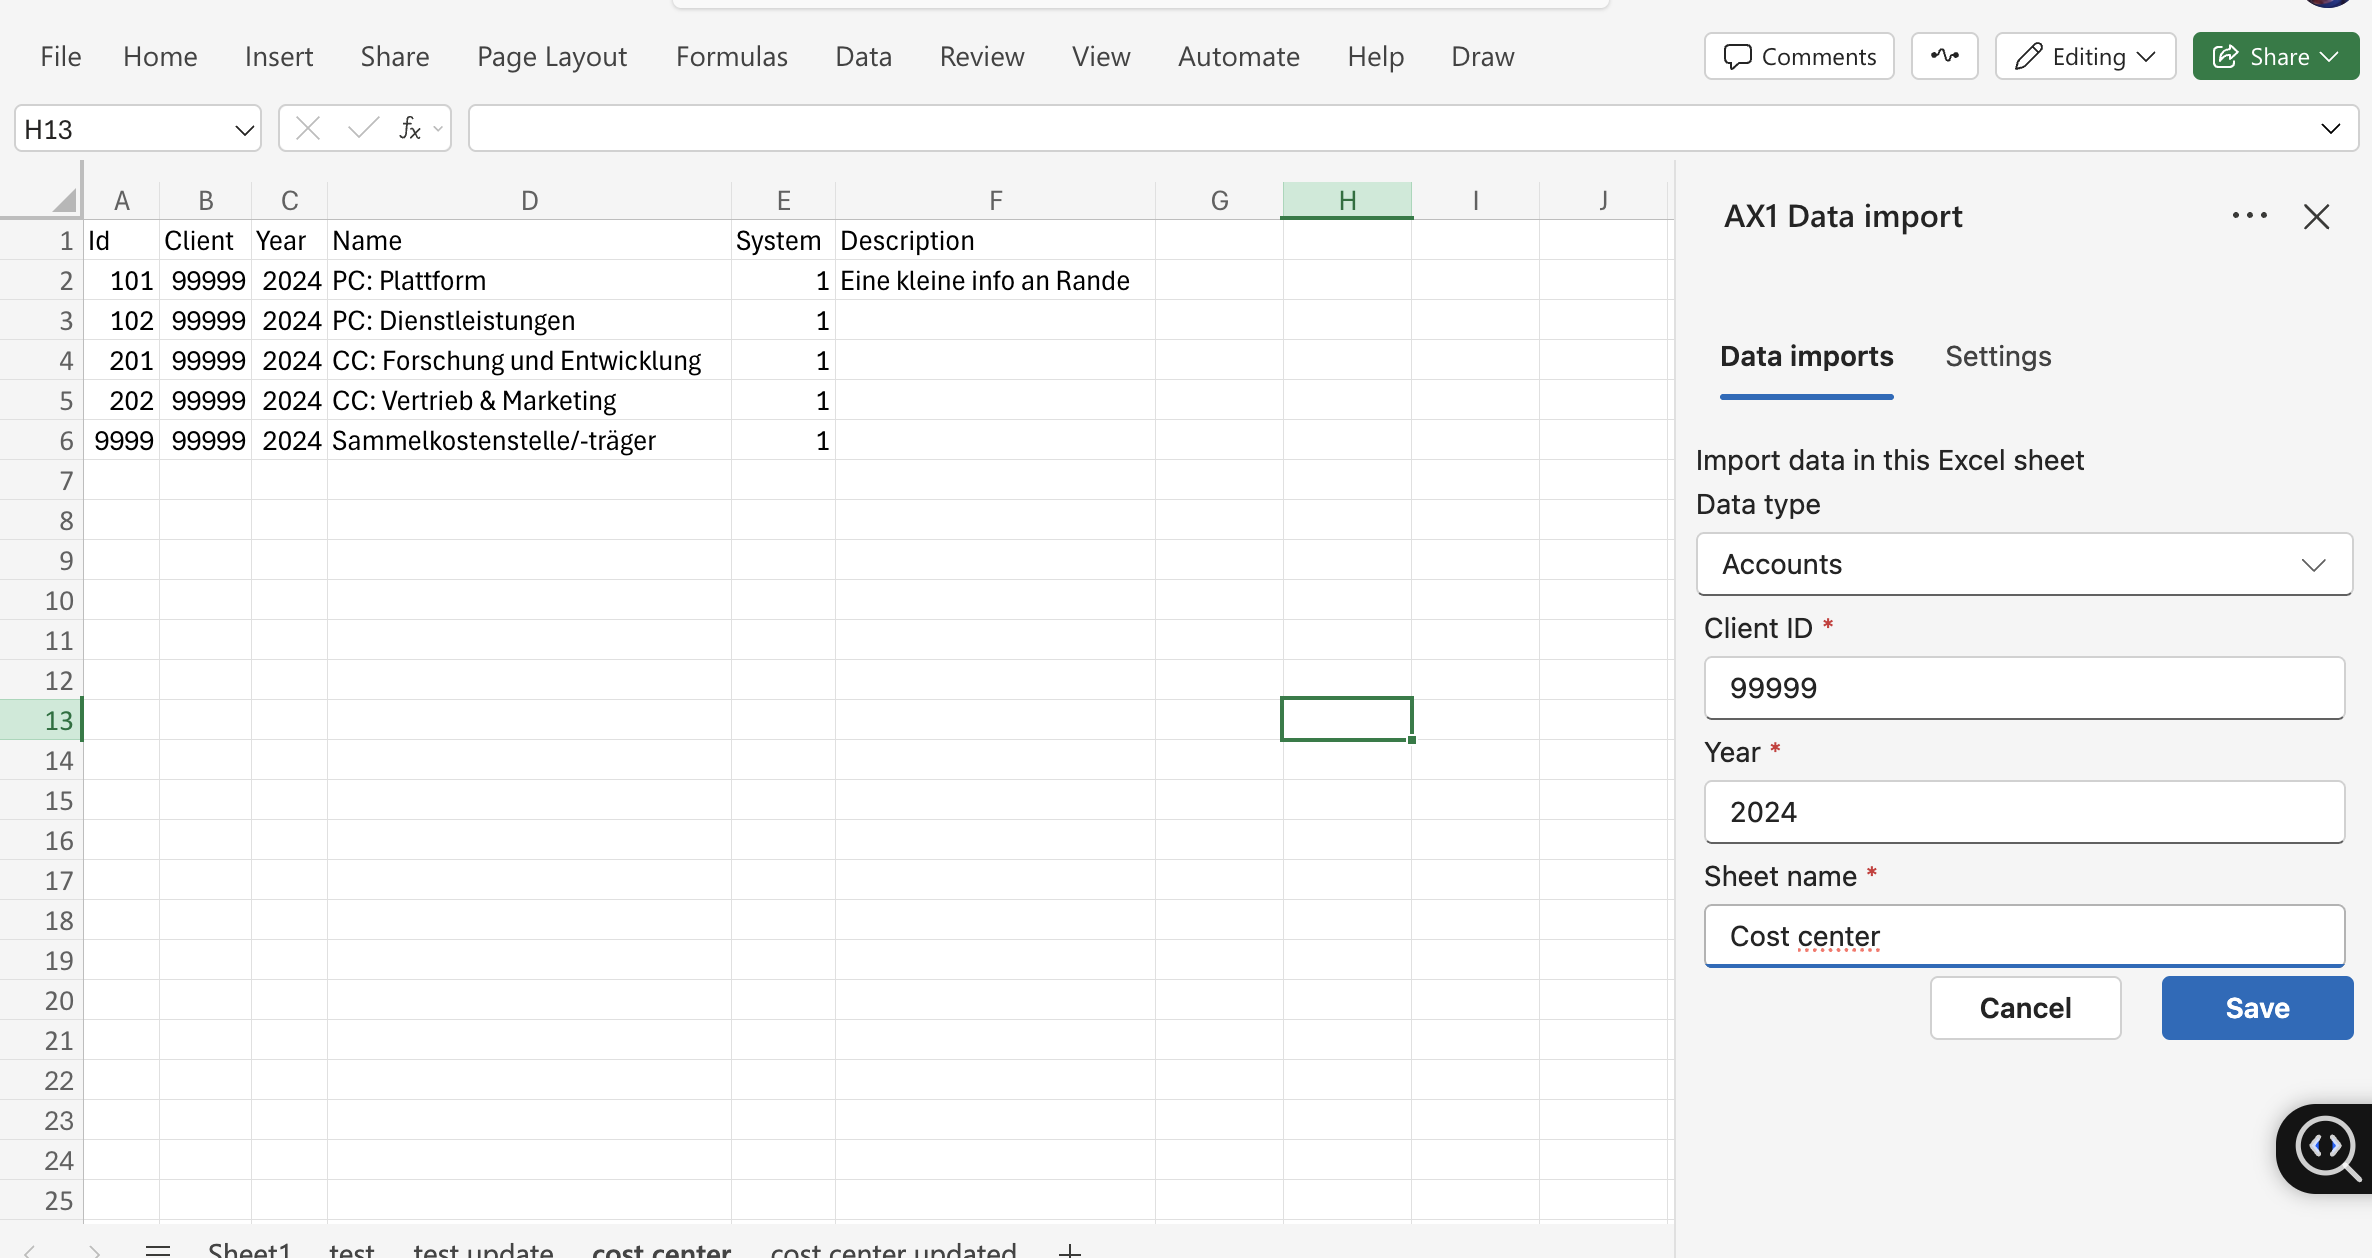
- Data Type: Select the type of data (e.g.,
Cost Centers,Entries,Accounts). - Year: Enter the fiscal year (e.g.,
2024). - Account: Input your account ID (e.g.,
12345). - Sheet Name: Name the sheet where data will be imported (e.g.,
Cost Centers 2024).
Click Save. The Add-in will automatically add the data import, and it will be listed as shown below.
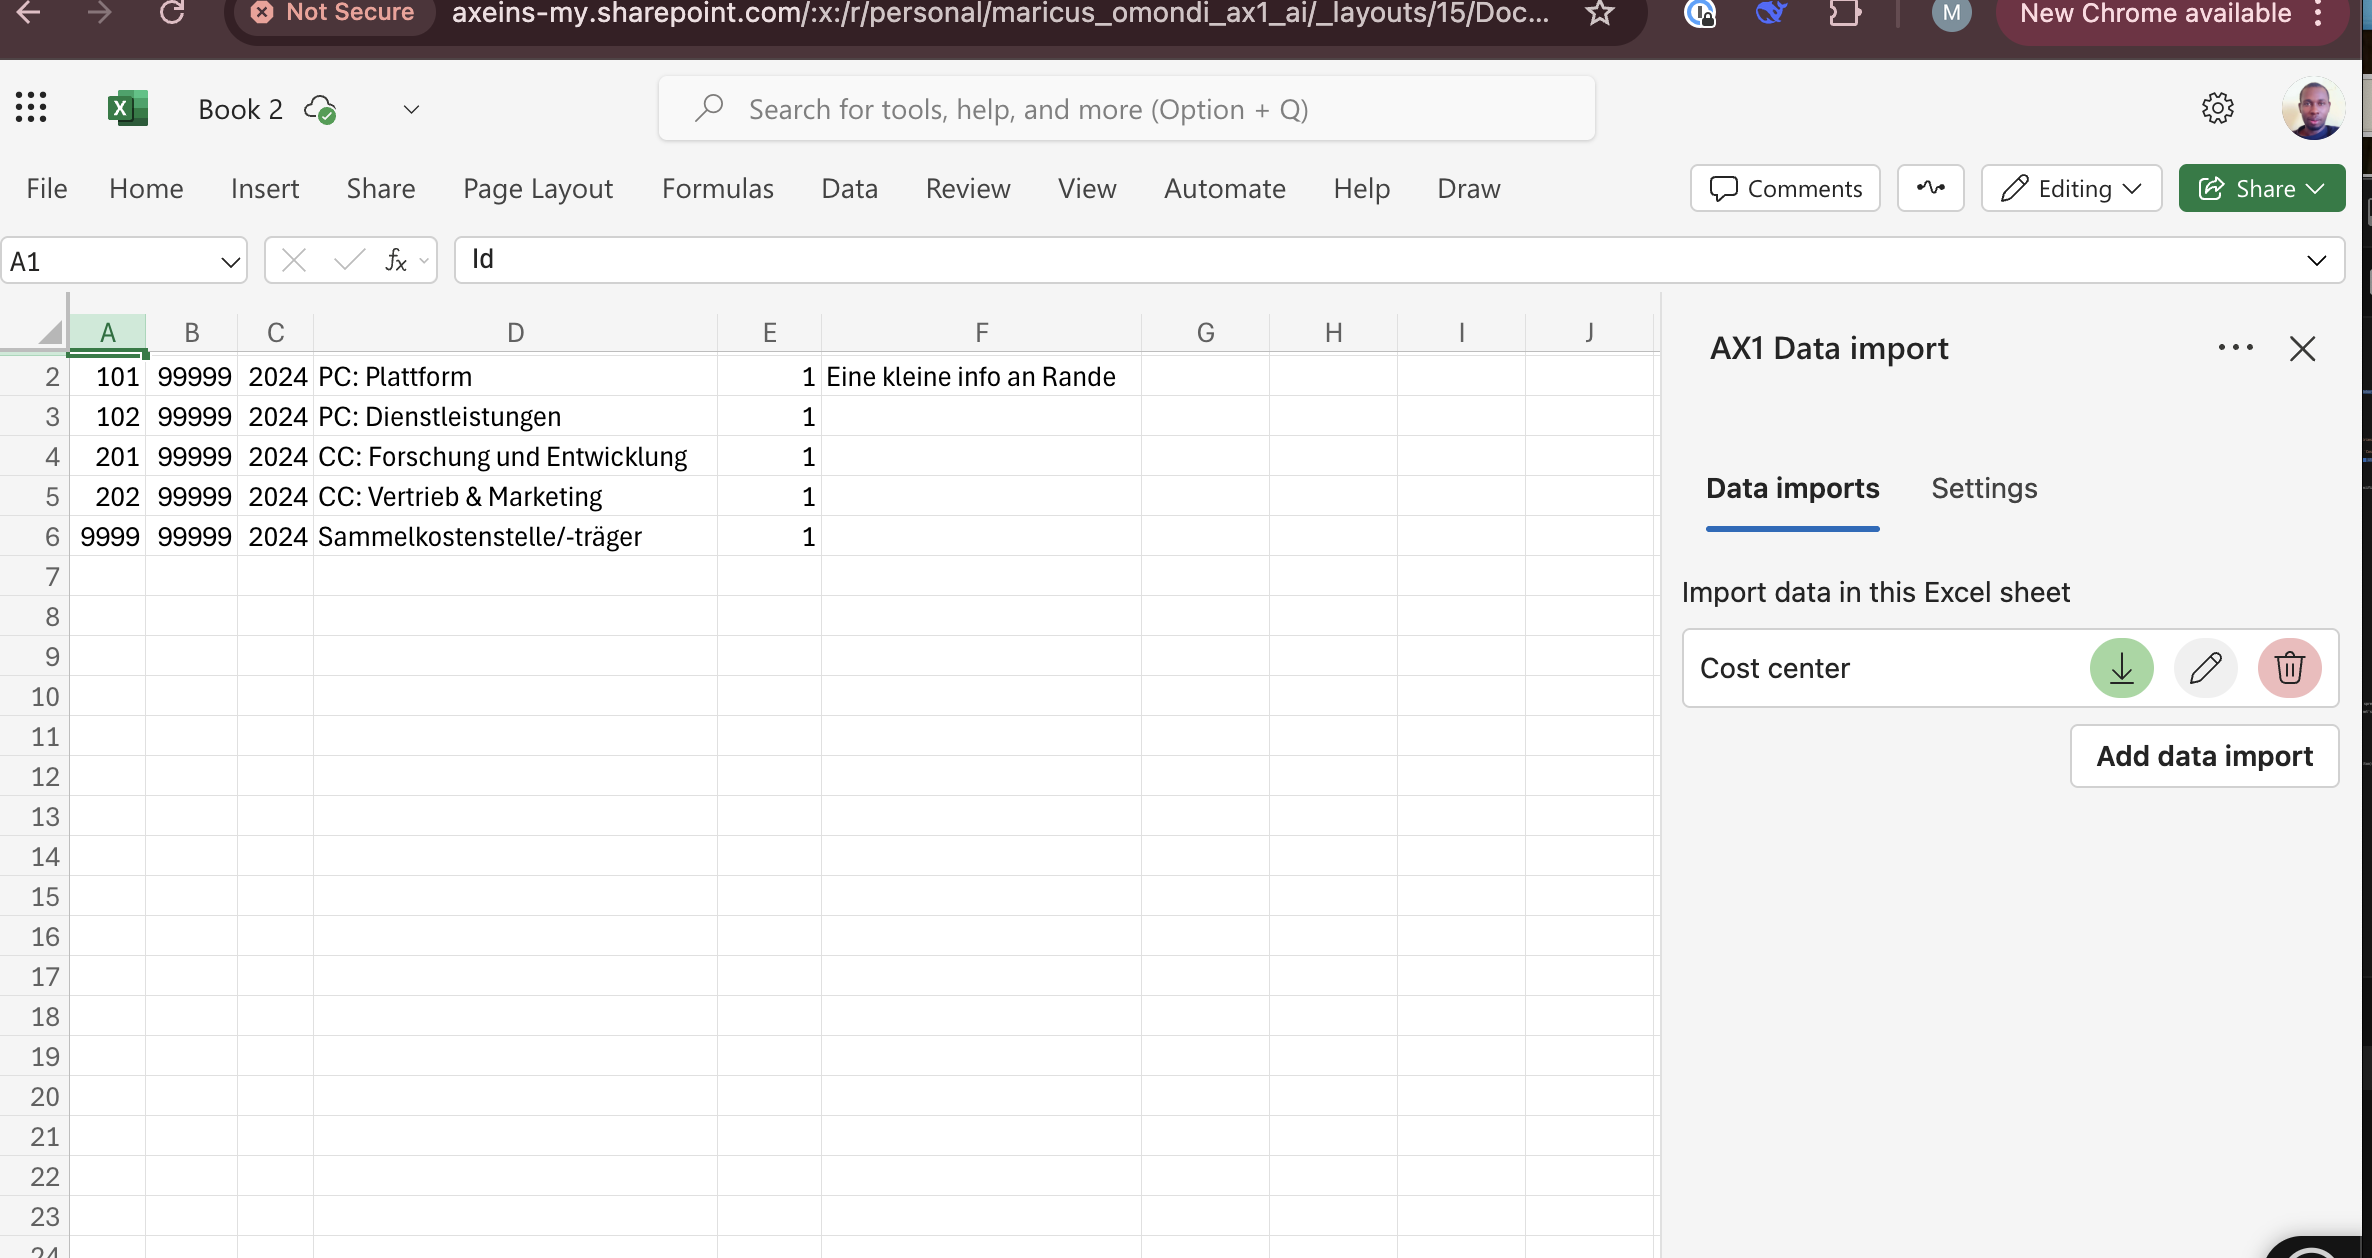
Click the Download Icon to have the data added to your Excel sheet
Step 3. Using the Add-on
Data Import Types
The AX1 Add-in imports three types of accounting data, each with specific columns:
1. Accounts
Shows all financial accounts in your system.
Columns:
-
Id: Unique account identifier -
Client: Associated client/organization -
Year: Fiscal year -
Number: Account number -
Type: Account category (e.g., Asset/Liability) -
Description: Account purpose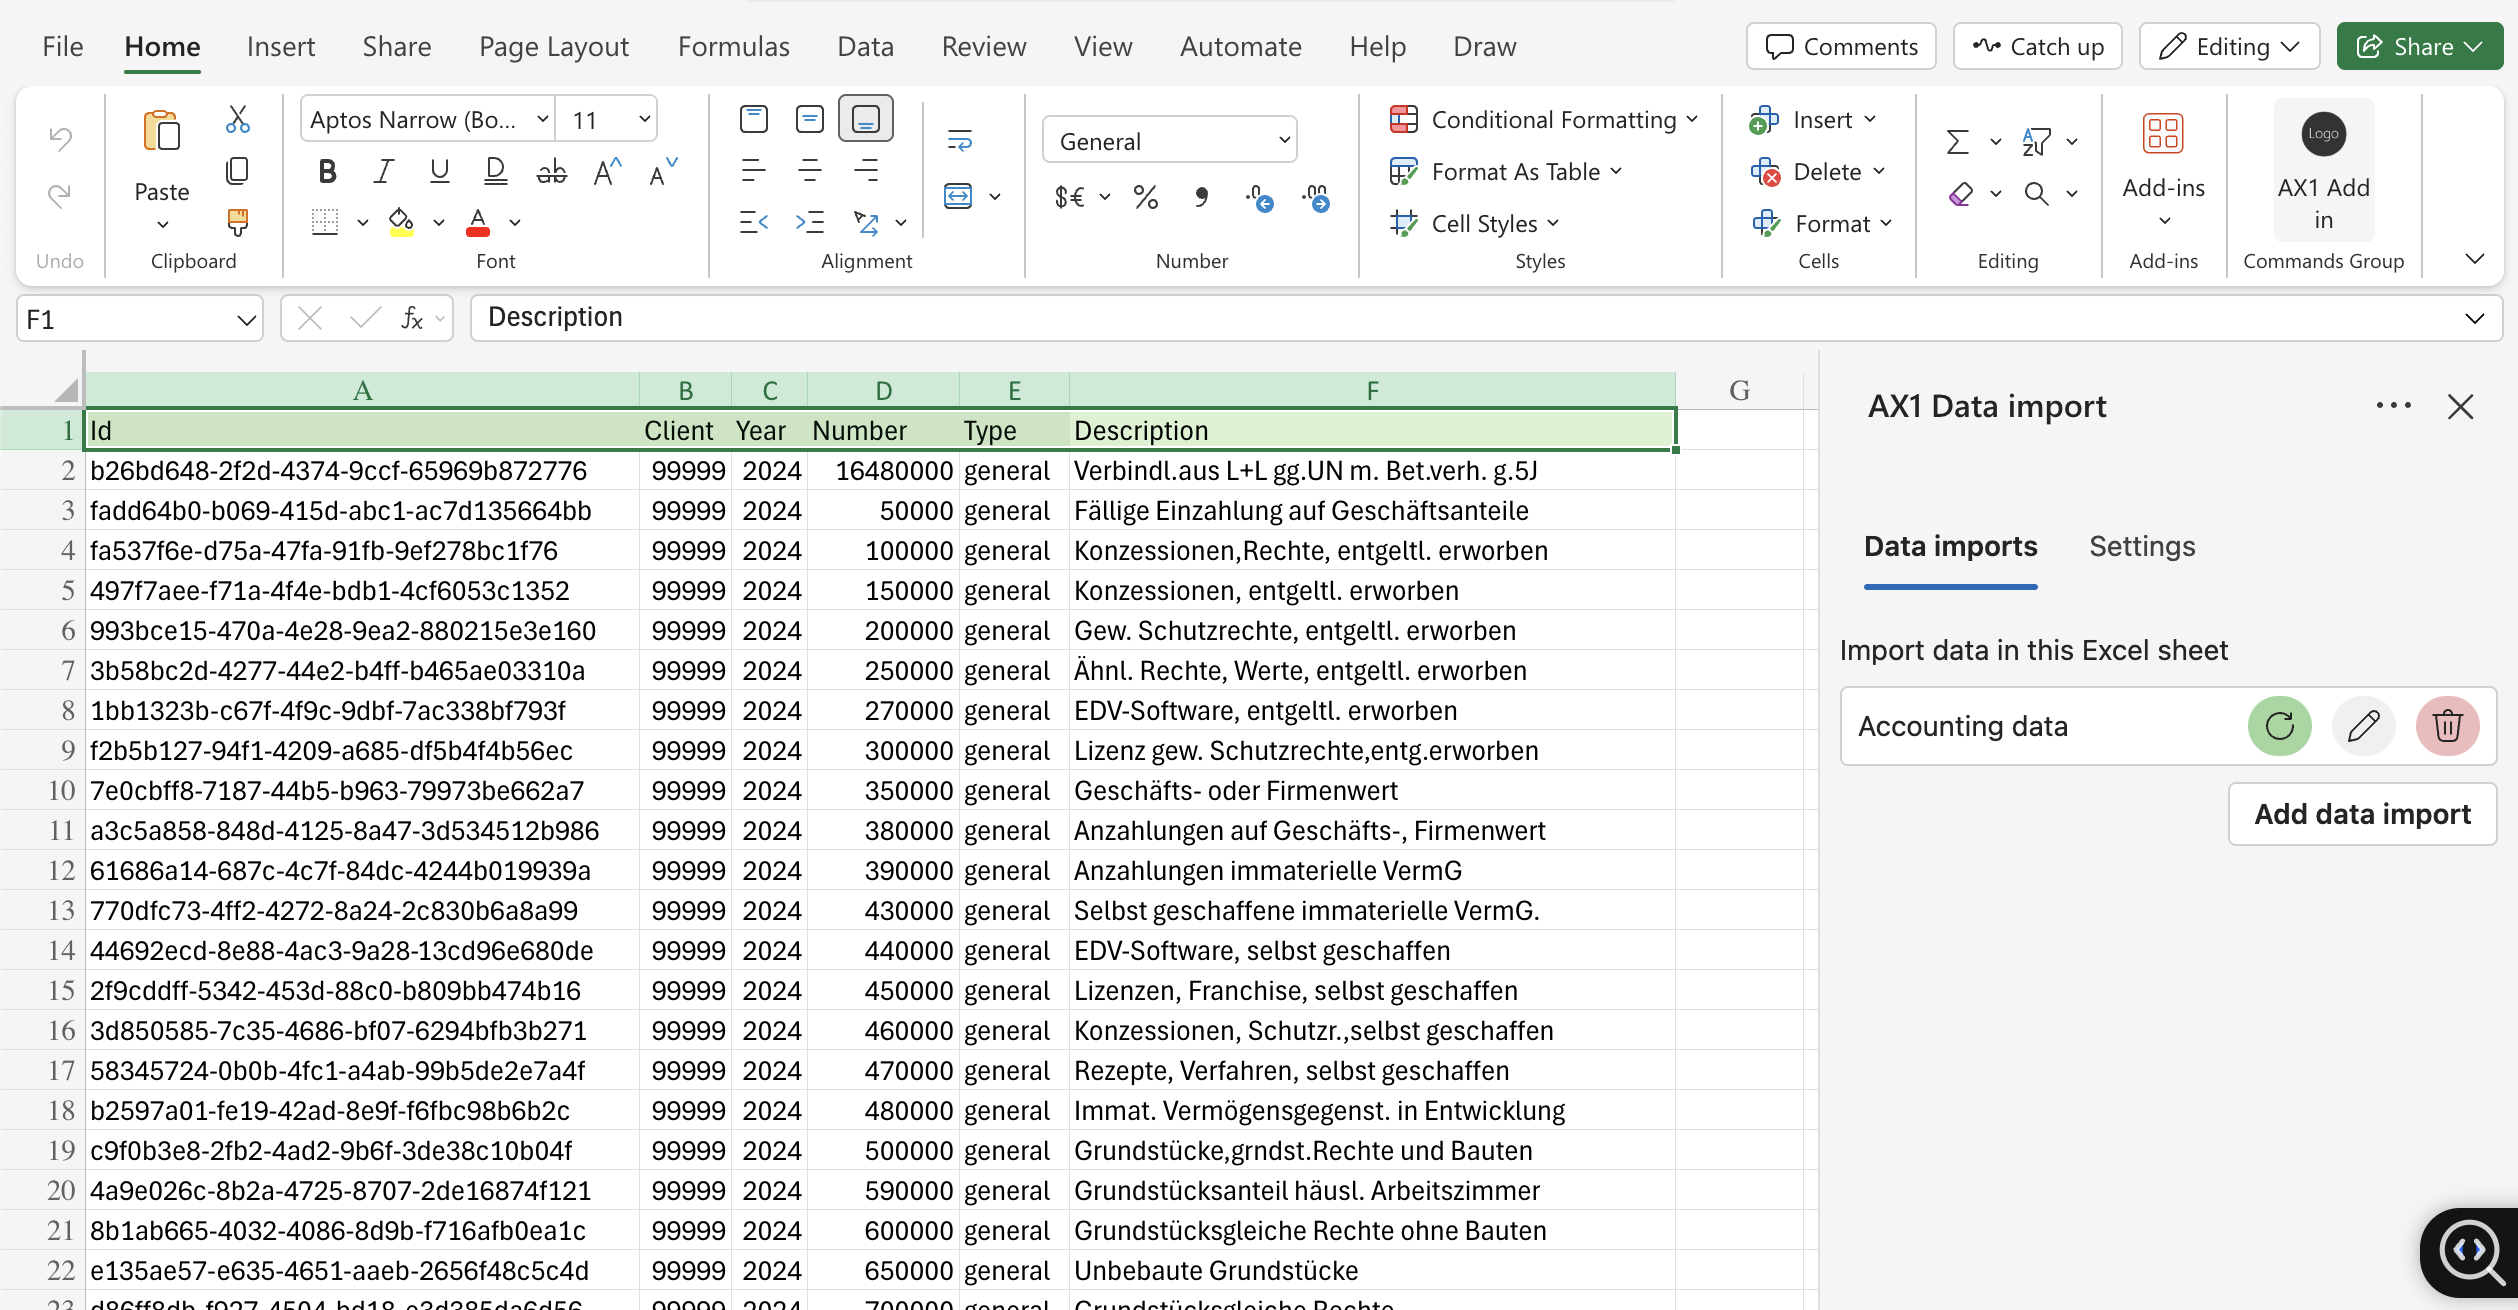
2. Cost Centers
Tracks departmental or project-based costs.
Columns:
-
Id: Unique identifier -
Client: Associated client -
Year: Fiscal year -
Name: Cost center name -
System: System classification -
Description: Cost center purpose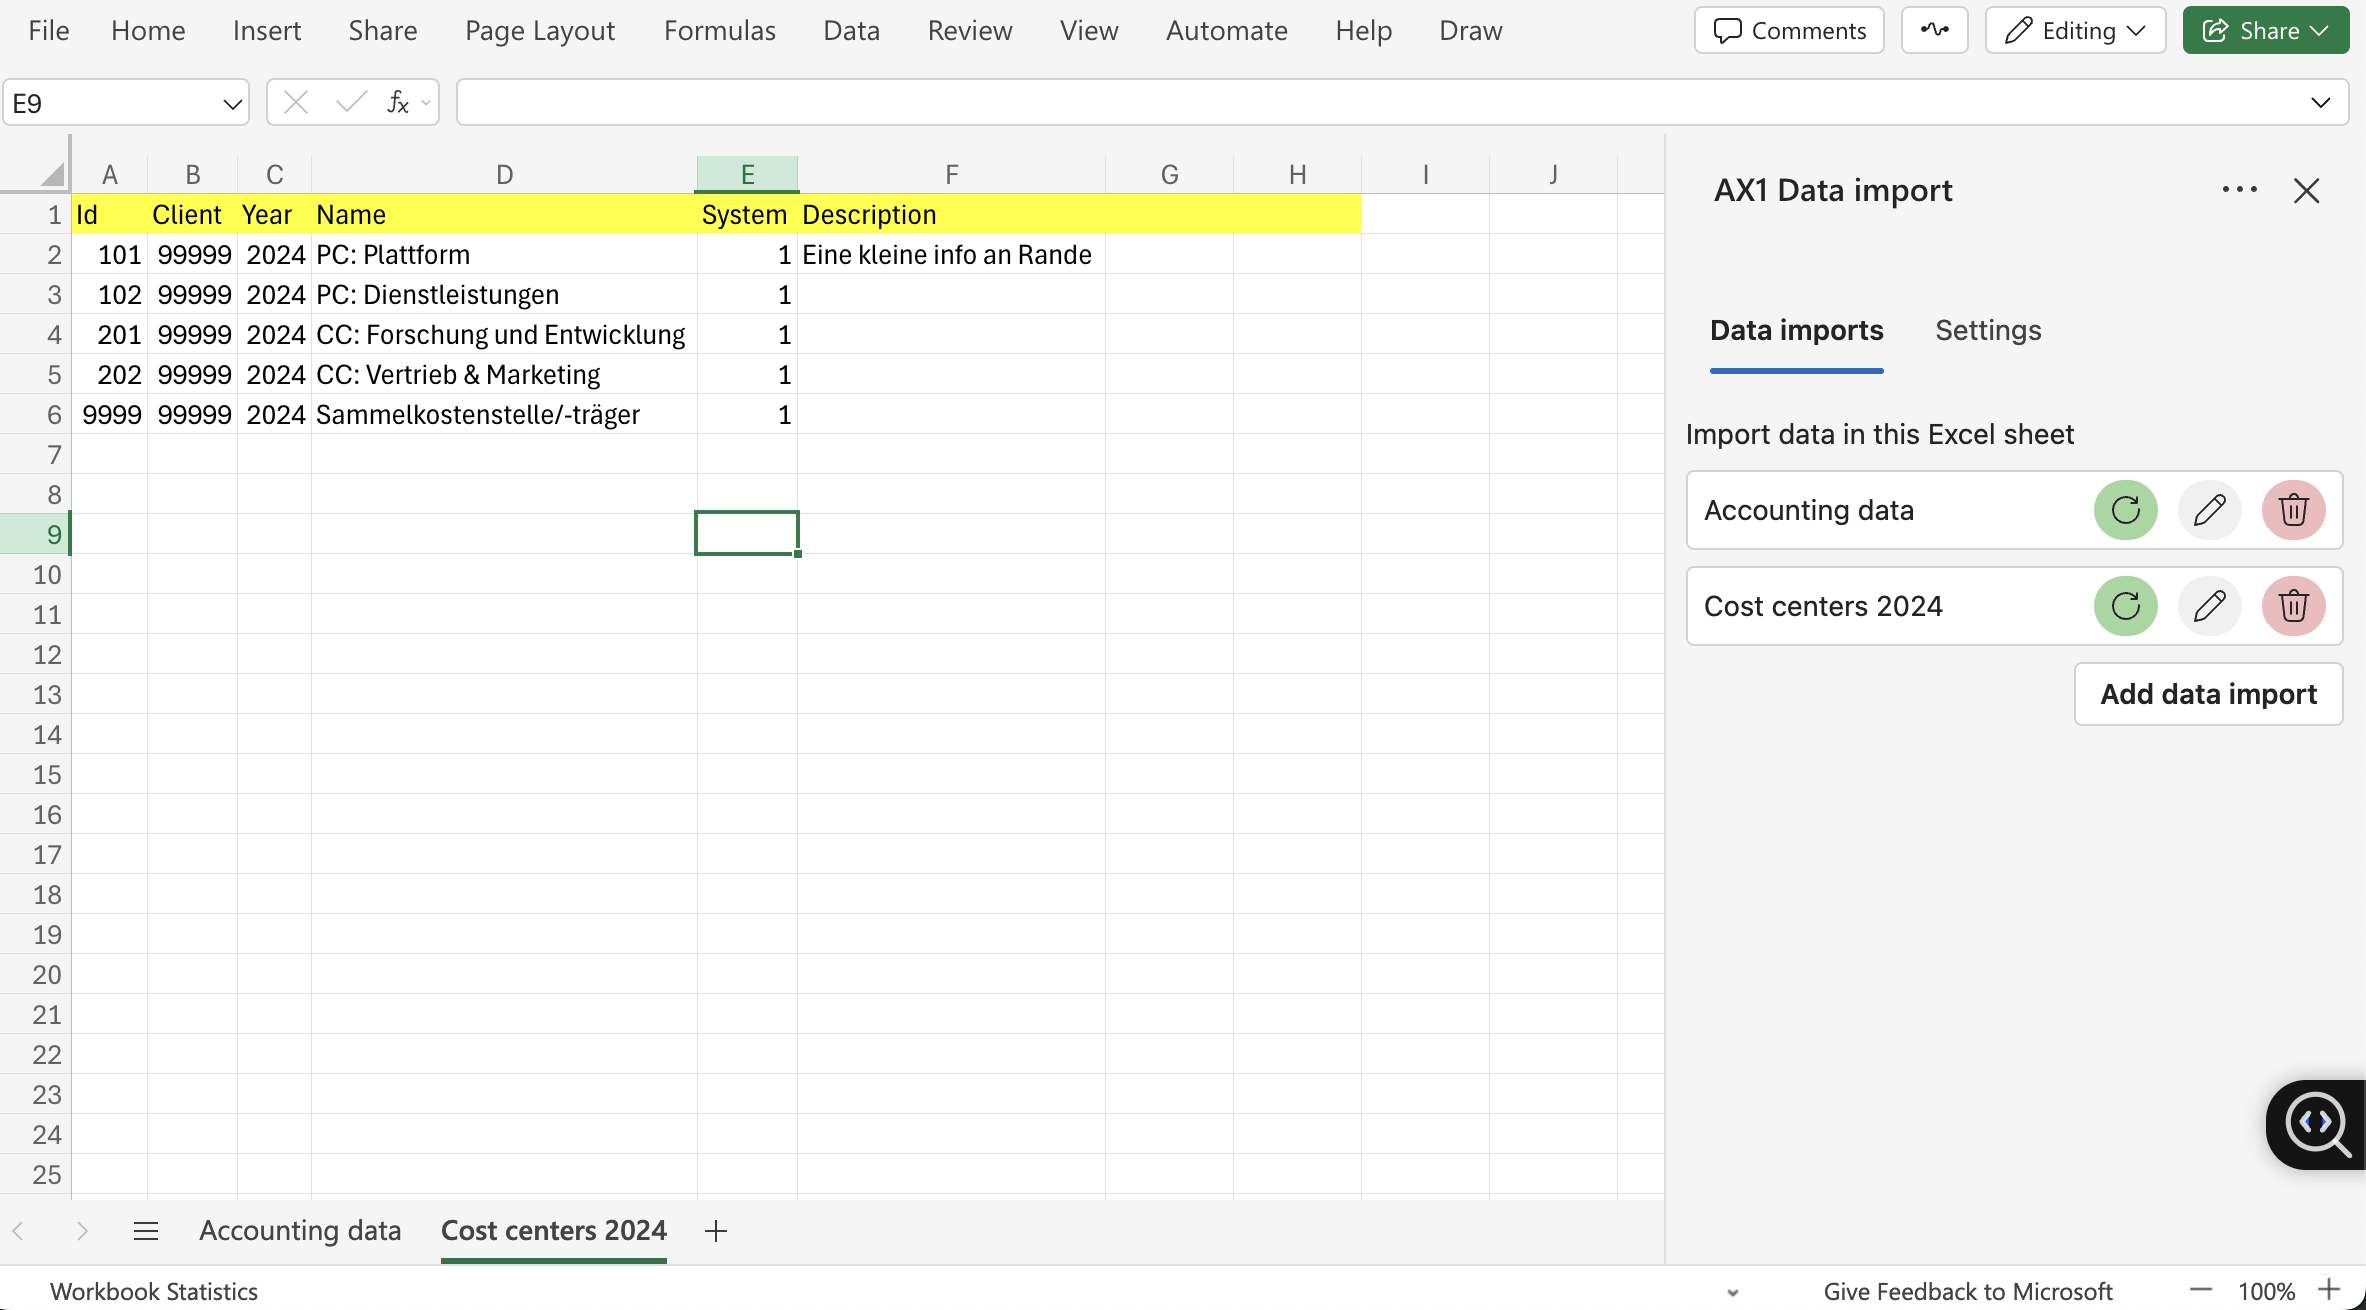
3. Entries
Detailed financial transactions.
Key Columns:
-
Id: Transaction ID -
Date: Transaction date -
Account: Impacted account -
Amount: Transaction value -
Currency: Currency code -
Cost Center 1/2: Associated cost centers -
Invoice/Receipt Nr: Reference numbers -
Batch: Transaction group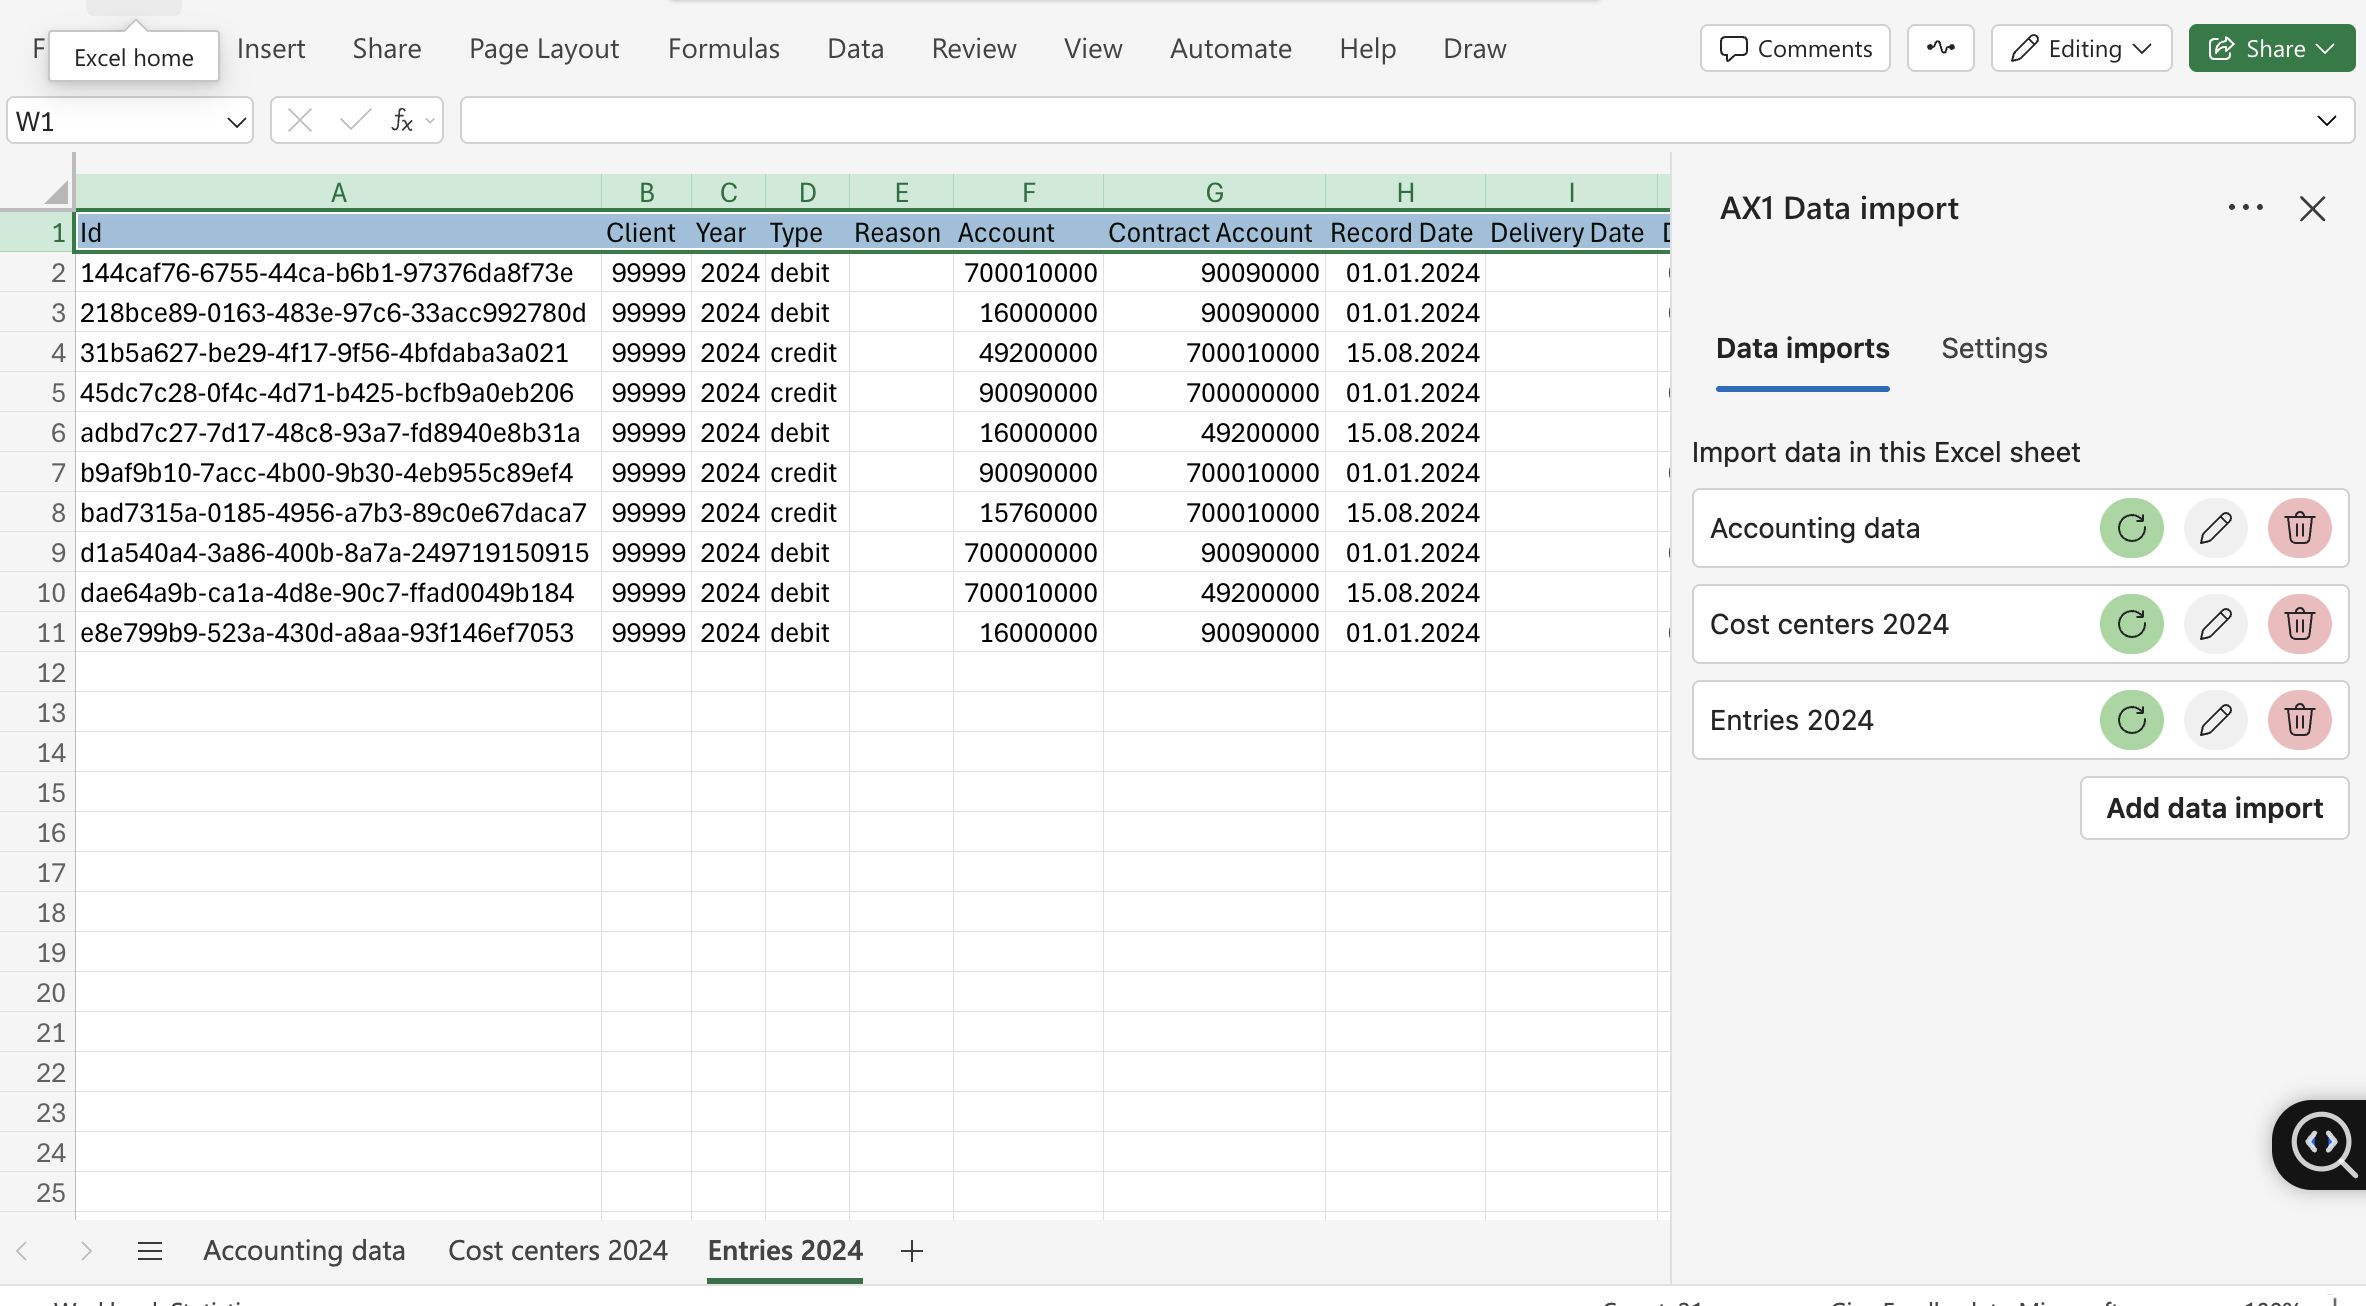
Refresh Behavior
- Data does not update automatically to preserve performance.
- To sync latest data:
- Open the Add-On sidebar
- Click Refresh icon
💡 This will update sheet data for the selected data import.
Example Workflow
-
First Import:
- Select
Entries→ Year2024→ Account12345 - Click Submit (creates new data import "Entries 2024")
- Click Download icon (creates new sheet "Entries 2024")
- Select
-
Later Refresh:
-
Open sidebar in same spreadsheet
-
Click Refresh icon for Entries 2024 to update existing sheet
💡 This will update sheet data for Entries 2024 data import.
-