Usage
Step 1: Open the Add-on
-
After installation, go to Extensions > AX1 > Data imports. This opens a sidebar with which you can install and manage data imports.

Step 2: Fetch Data
Fill in the form in the sidebar:
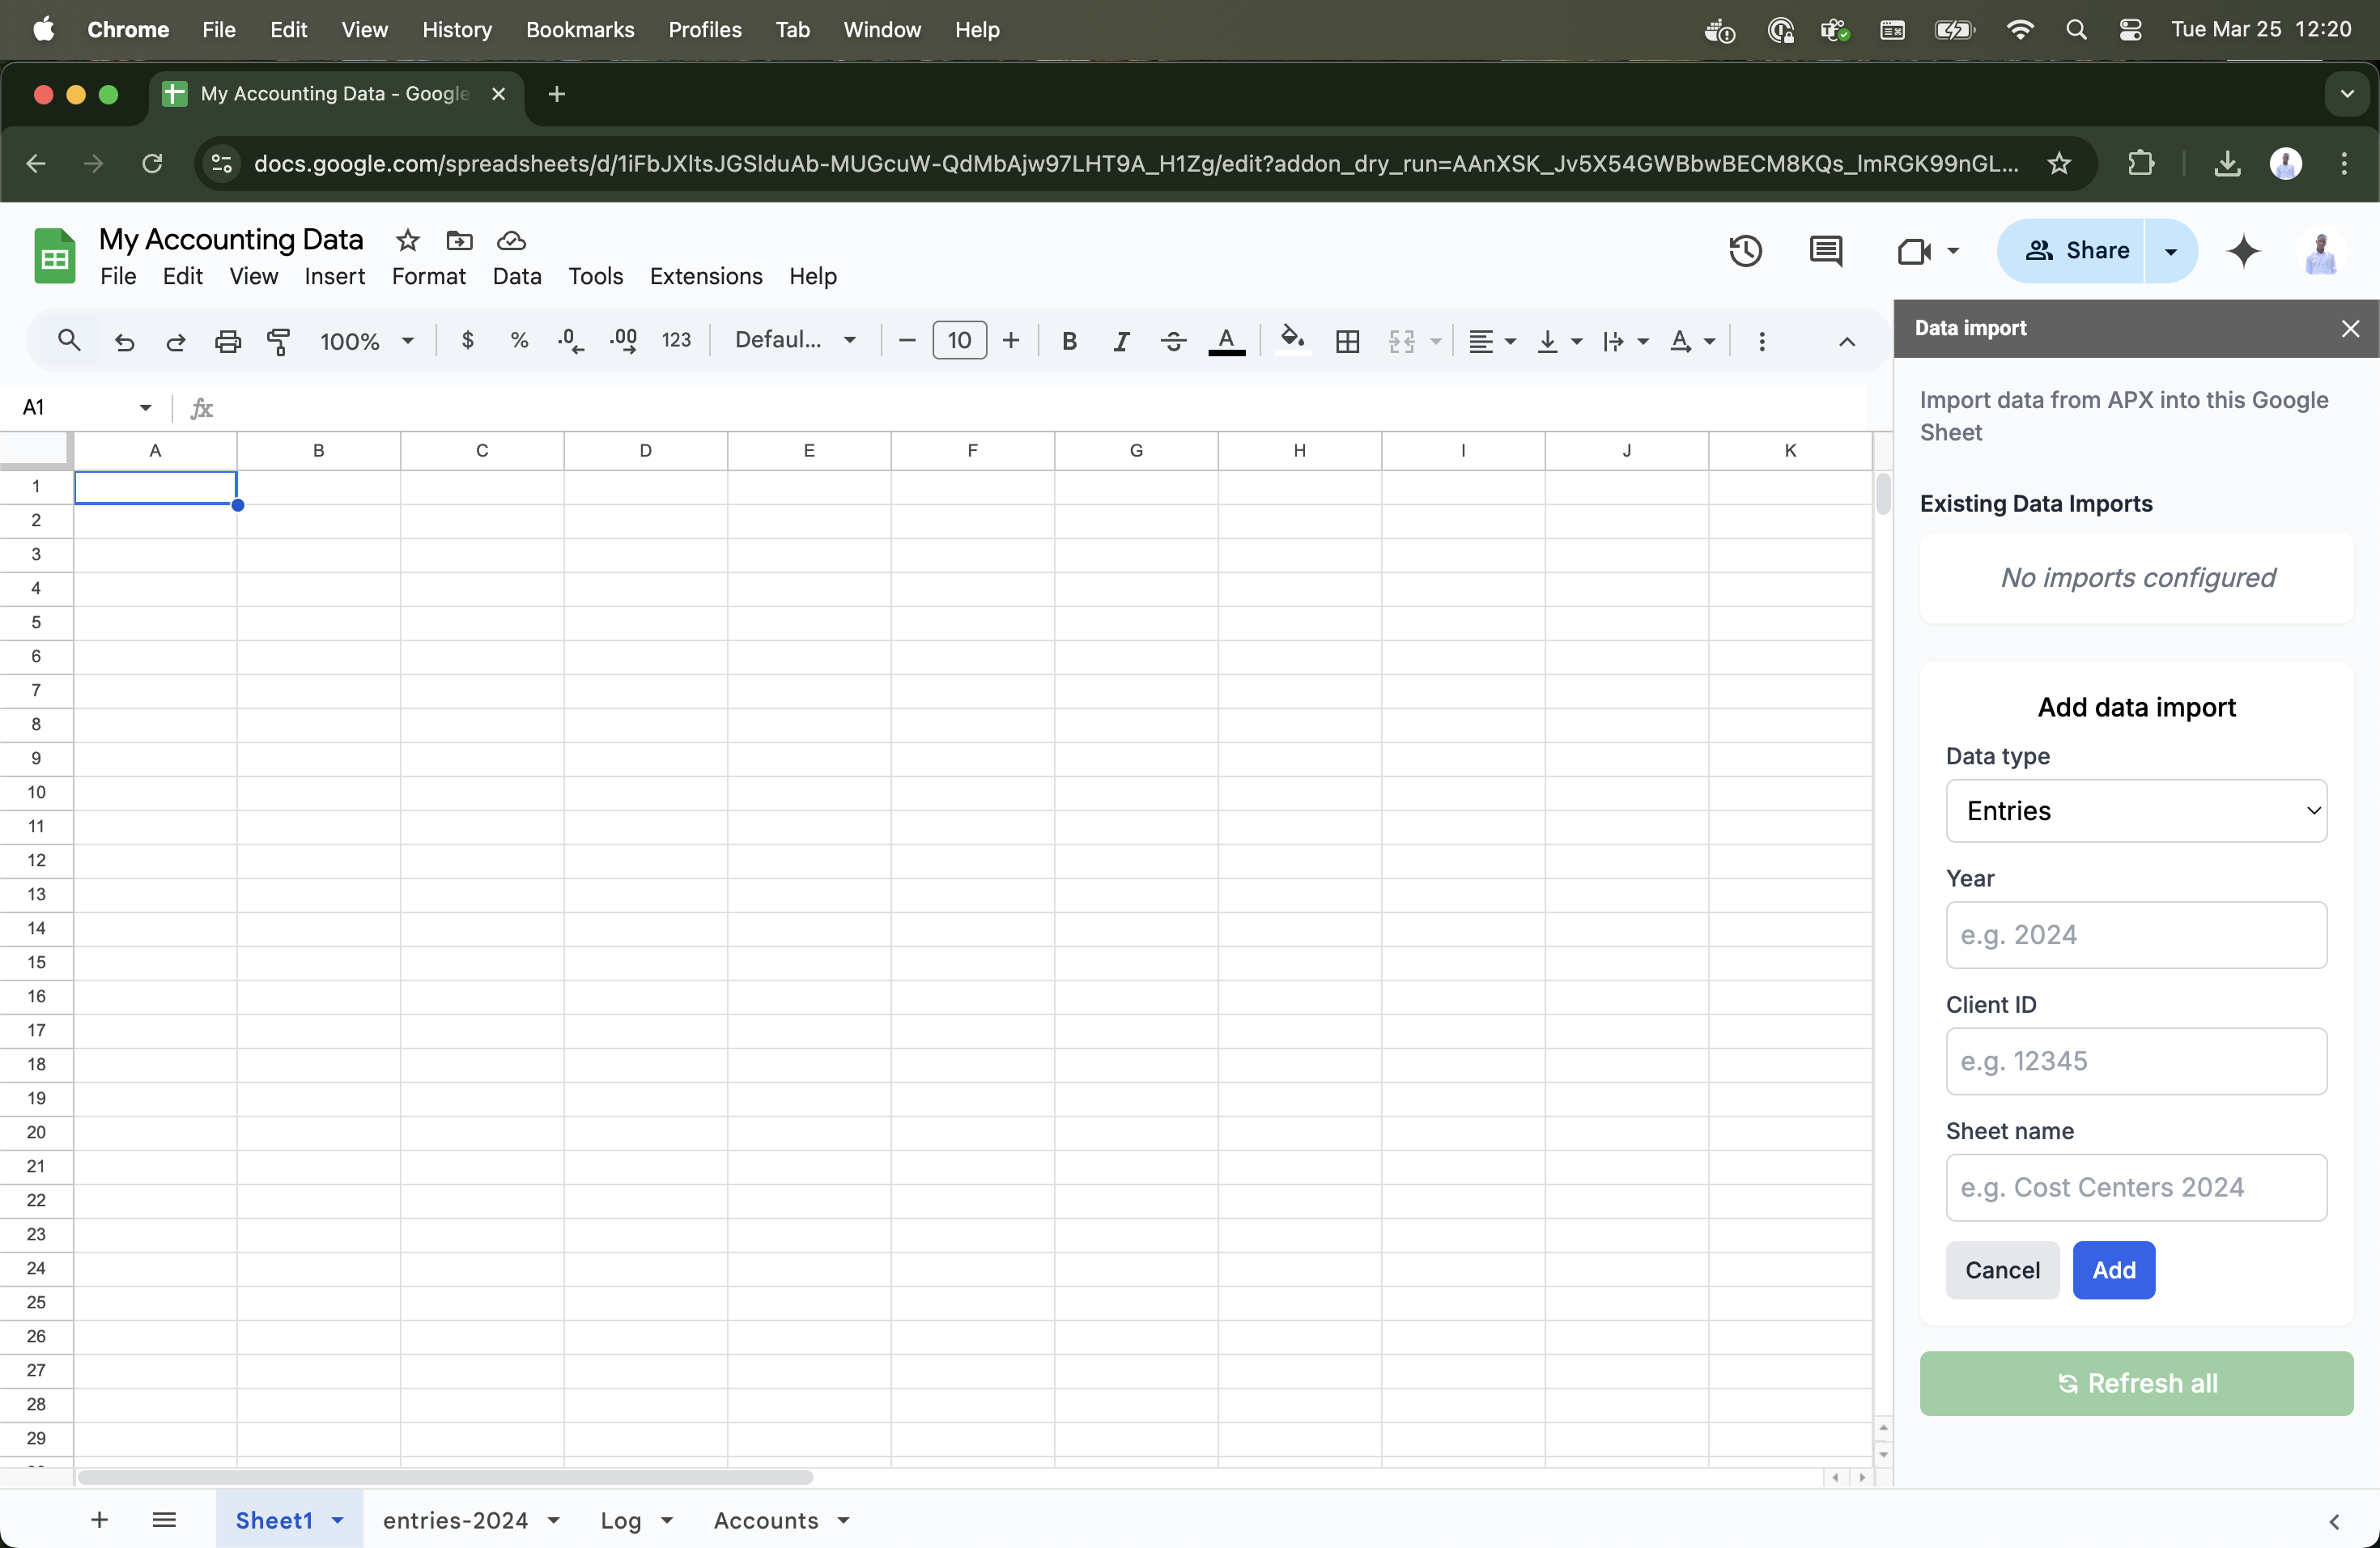
- Data Type: Select the type of data (e.g.,
Cost Centers,Entries,Accounts). - Year: Enter the fiscal year (e.g.,
2024). - Account: Input your account ID (e.g.,
12345). - Sheet Name: Name the sheet where data will be imported (e.g.,
Cost Centers 2024).
Click Submit. The Add-on will fetch and populate the data automatically.
Step 3. Using the Add-on
Data Import Types
The AX1 Add-on imports three types of accounting data, each with specific columns:
1. Accounts
Shows all financial accounts in your system.
Columns:
-
Id: Unique account identifier -
Client: Associated client/organization -
Year: Fiscal year -
Number: Account number -
Type: Account category (e.g., Asset/Liability) -
Description: Account purpose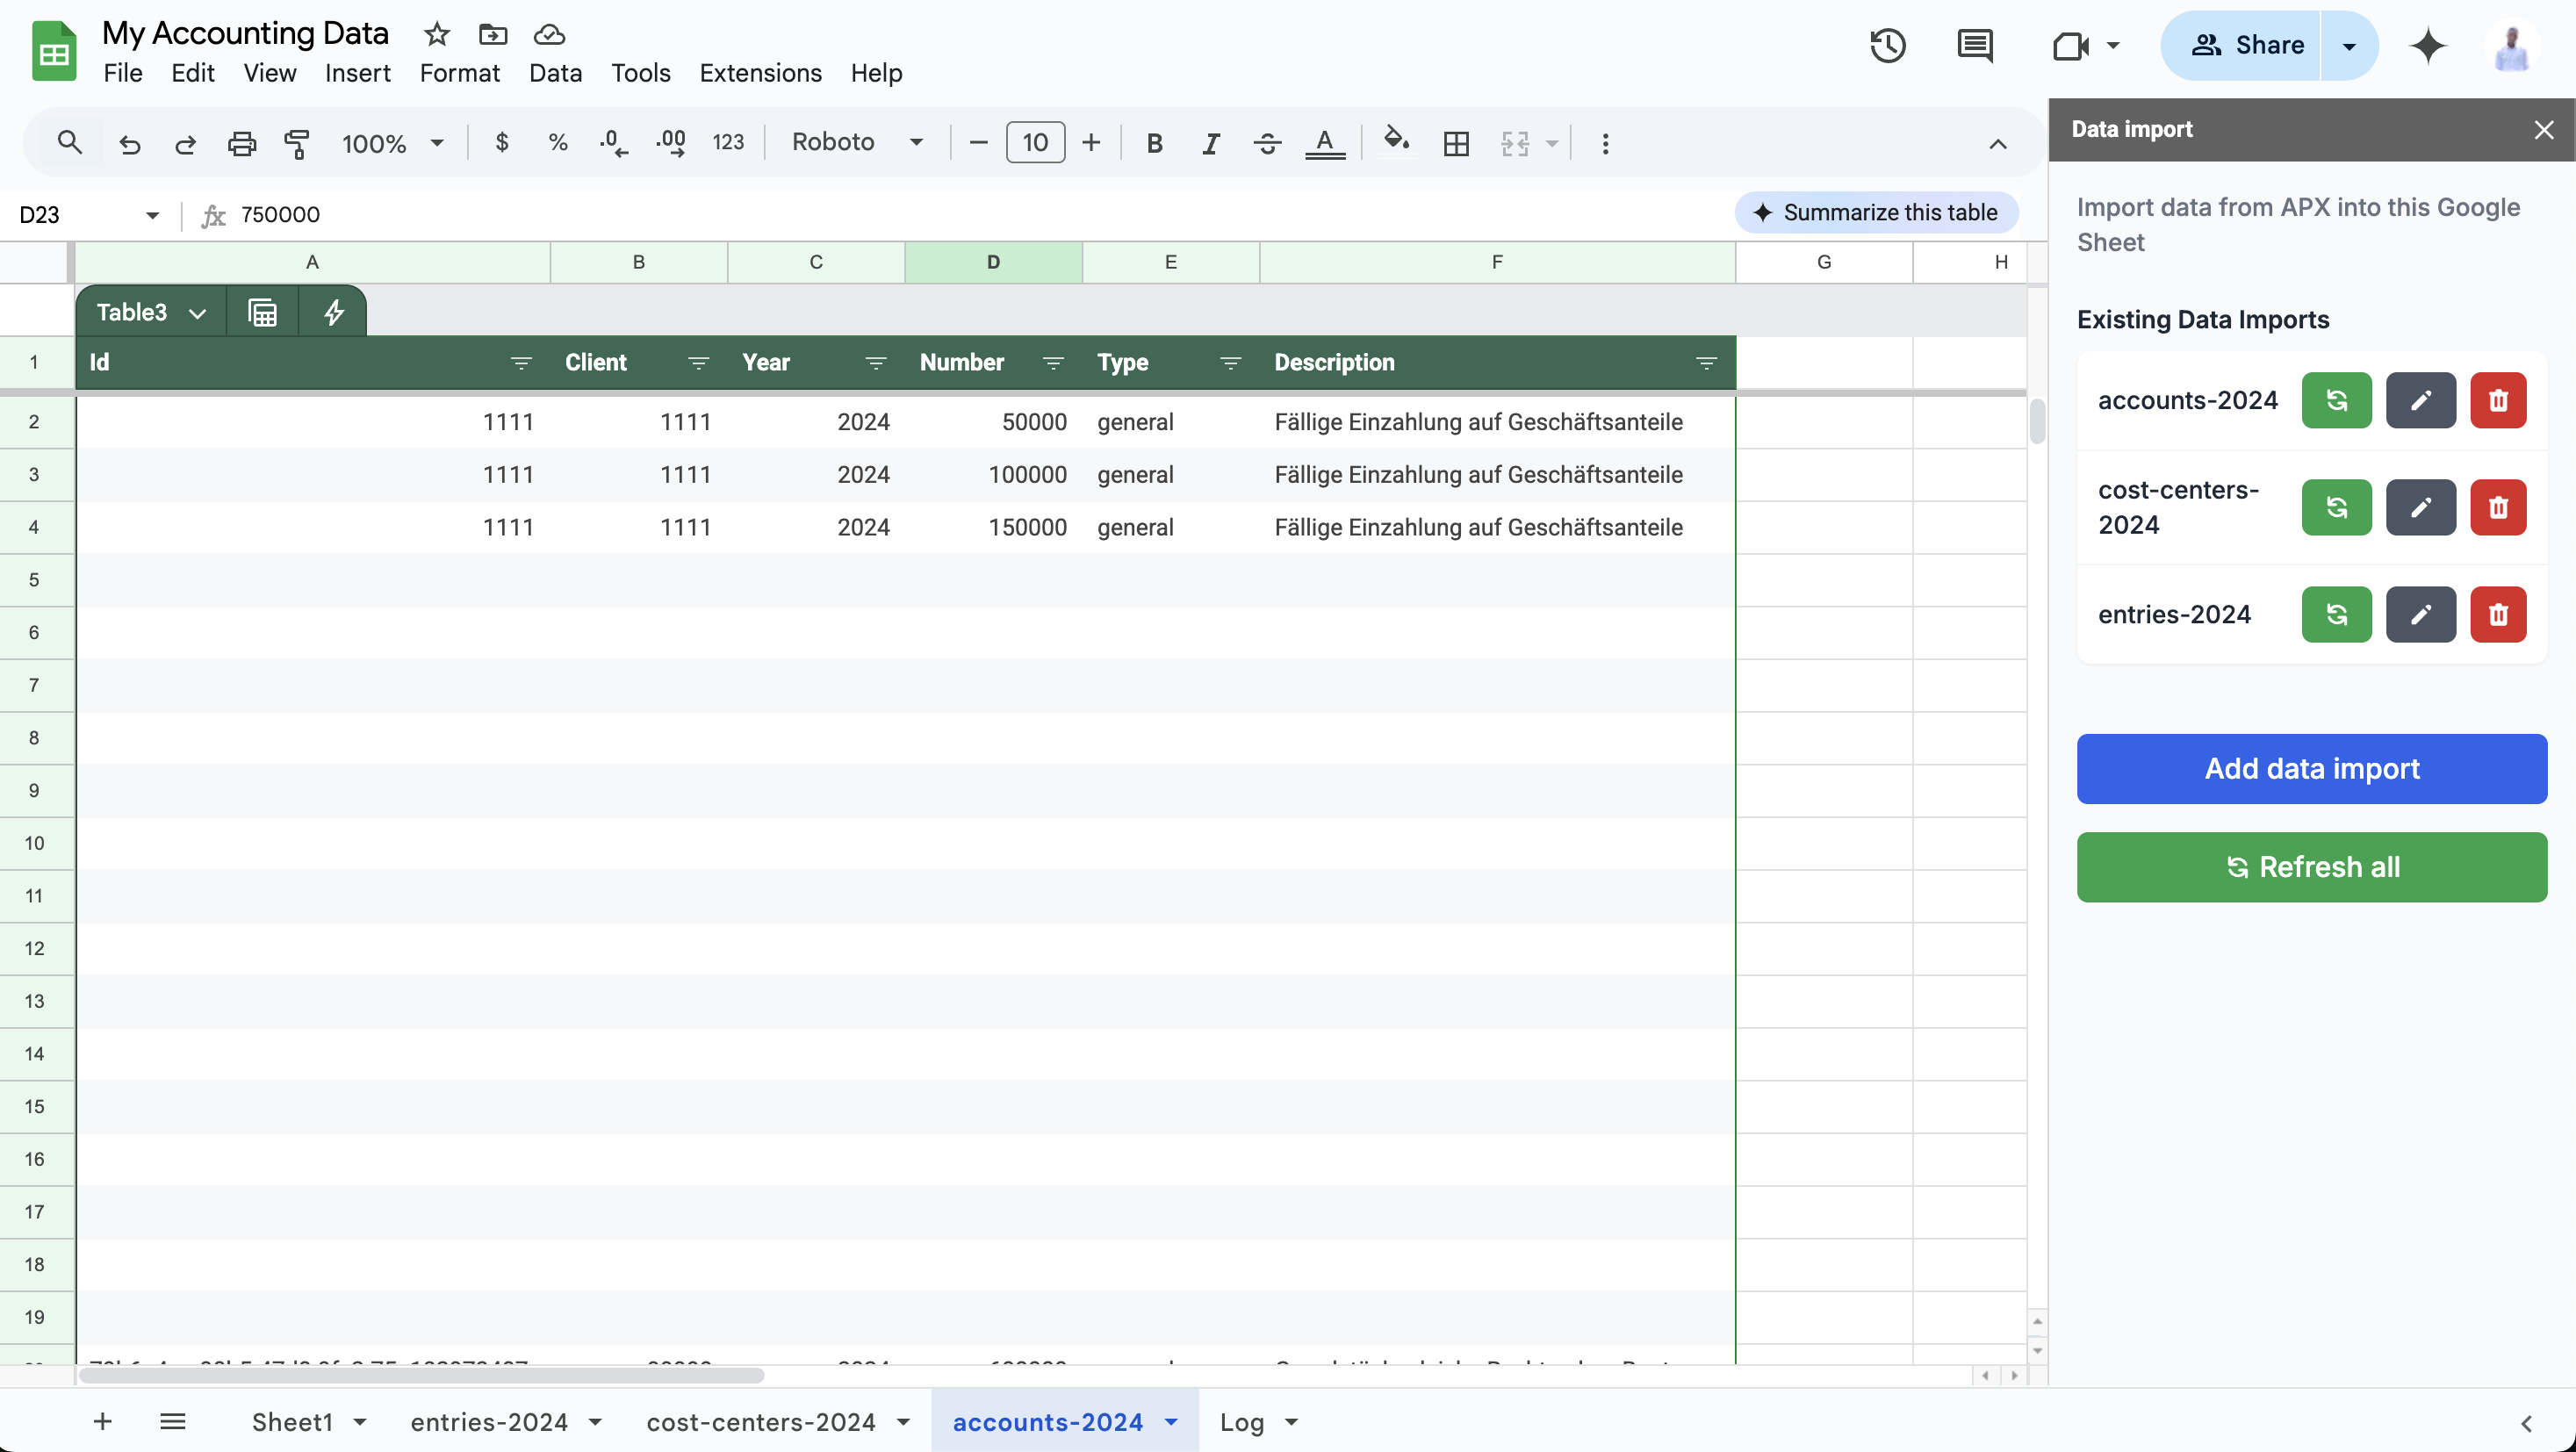
2. Cost Centers
Tracks departmental or project-based costs.
Columns:
-
Id: Unique identifier -
Client: Associated client -
Year: Fiscal year -
Name: Cost center name -
System: System classification -
Description: Cost center purpose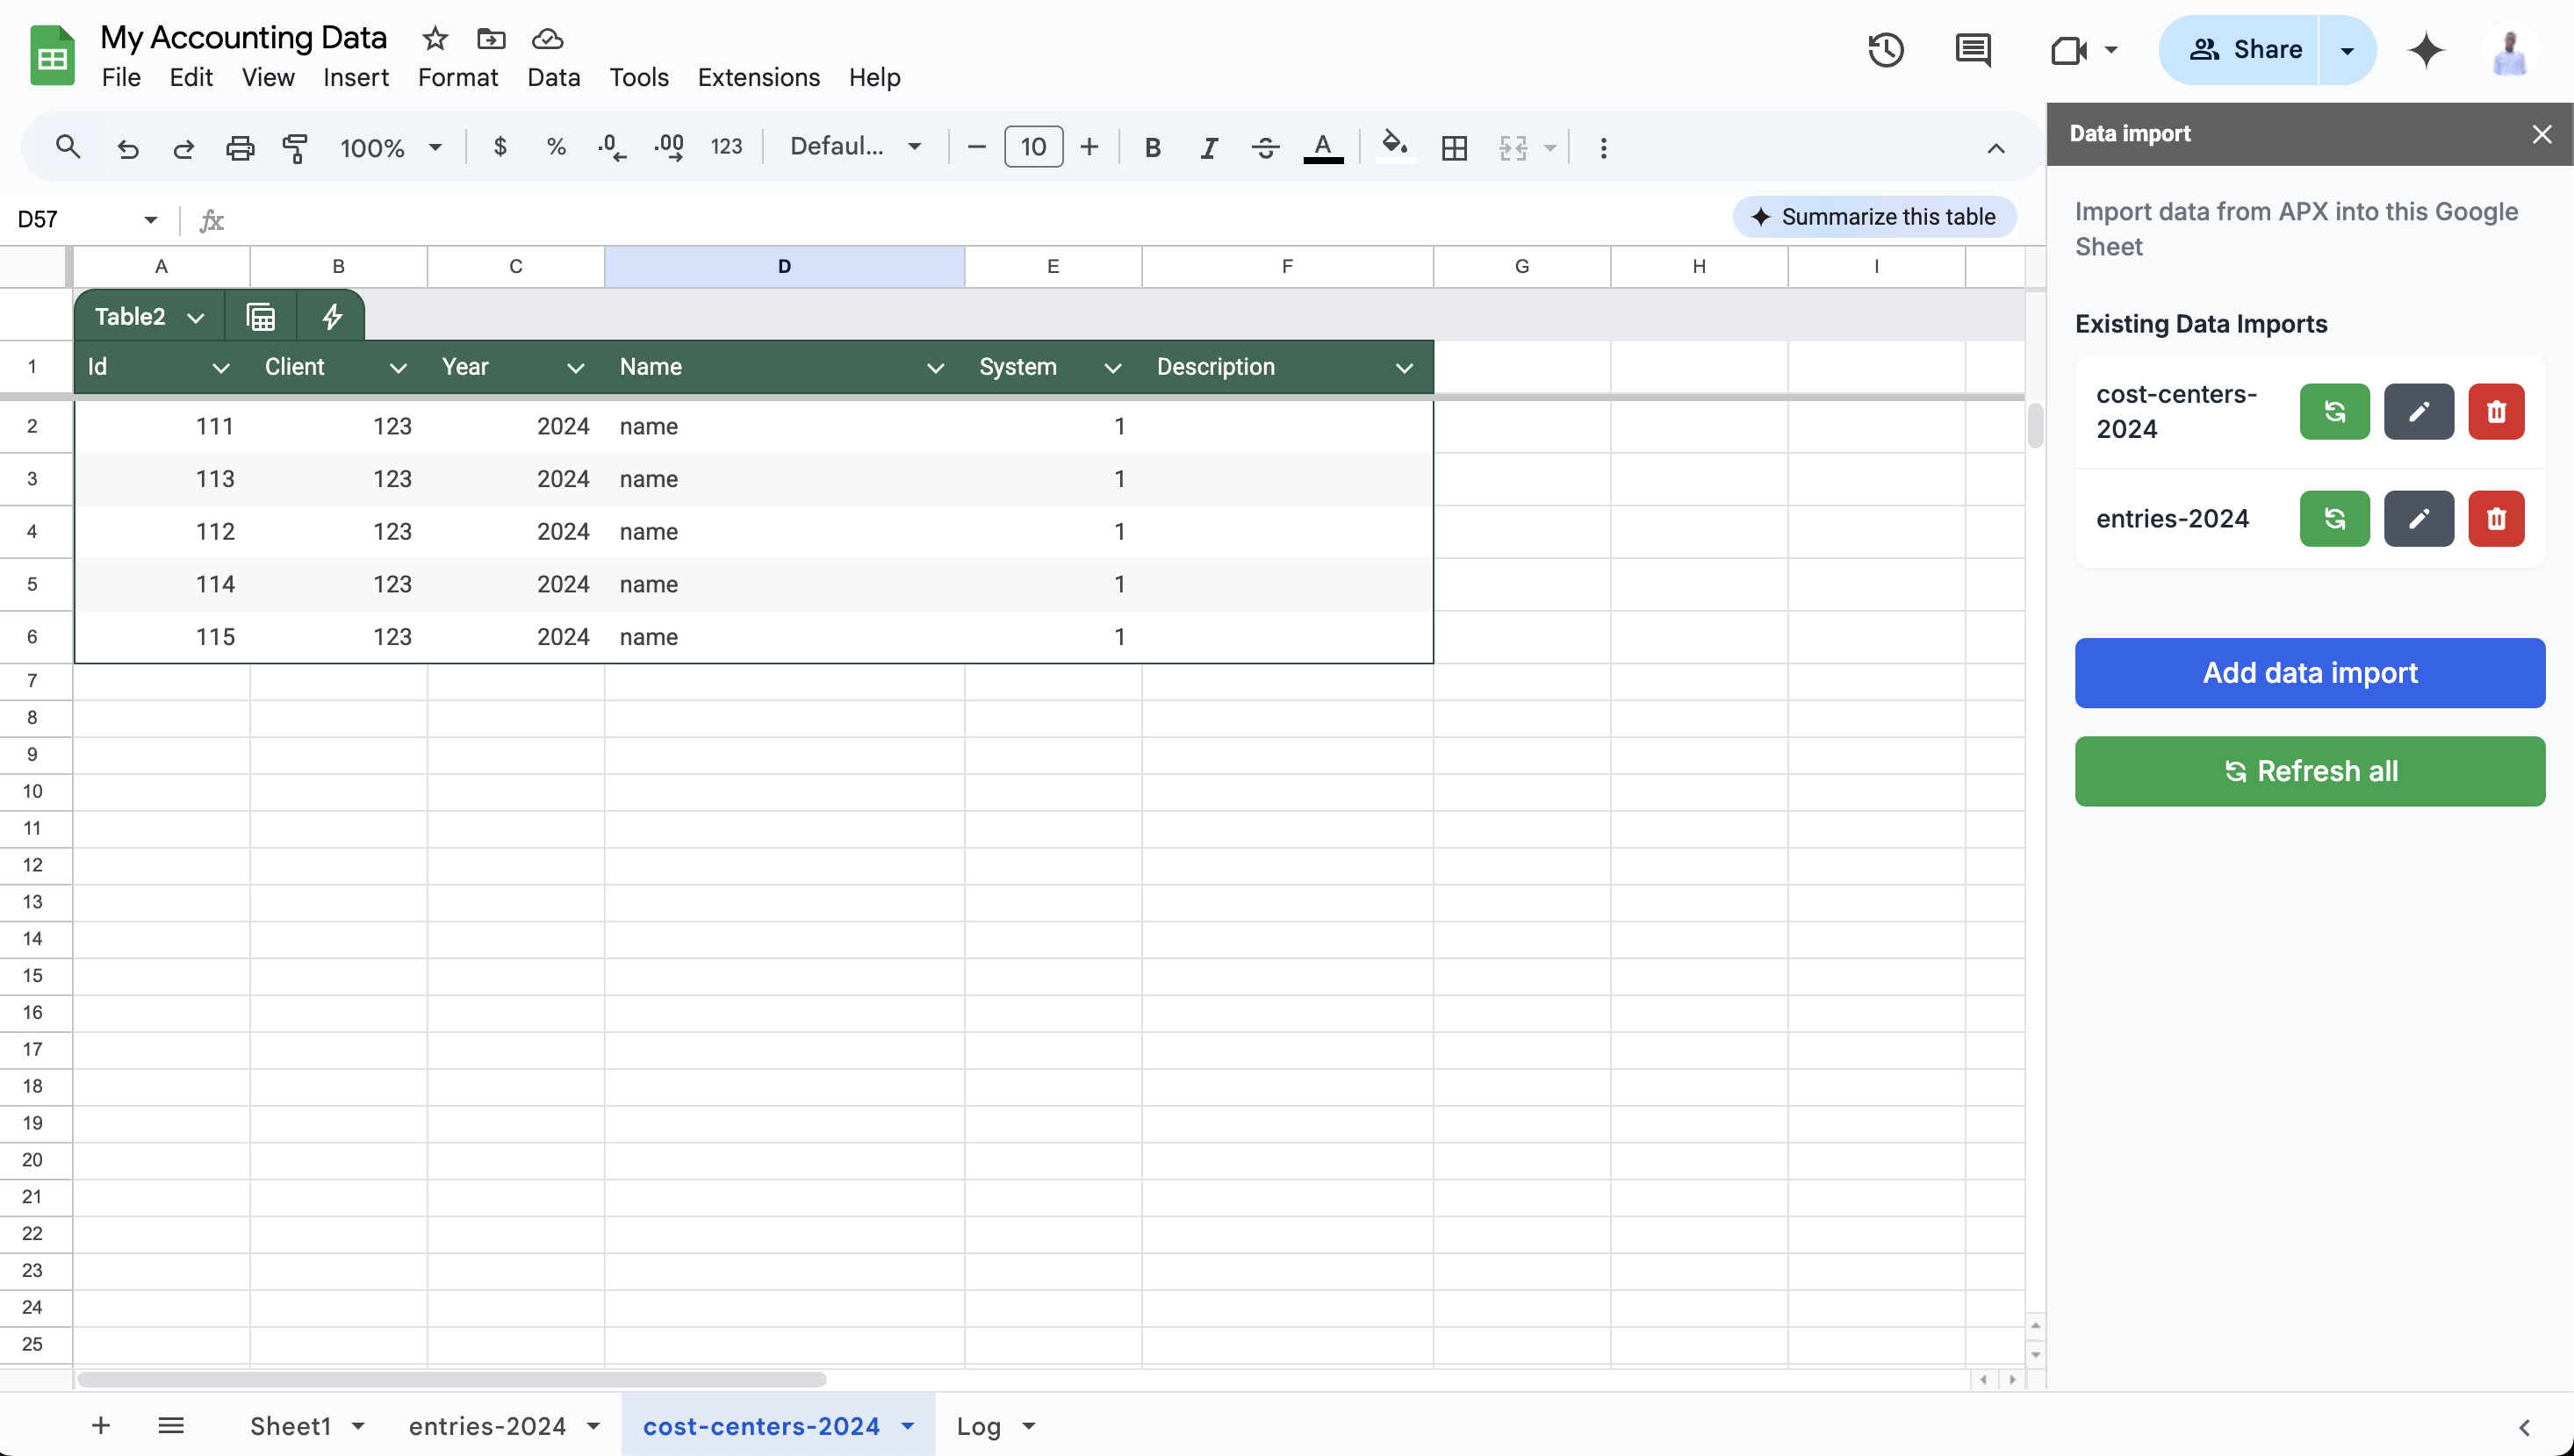
3. Entries
Detailed financial transactions.
Key Columns:
-
Id: Transaction ID -
Date: Transaction date -
Account: Impacted account -
Amount: Transaction value -
Currency: Currency code -
Cost Center 1/2: Associated cost centers -
Invoice/Receipt Nr: Reference numbers -
Batch: Transaction group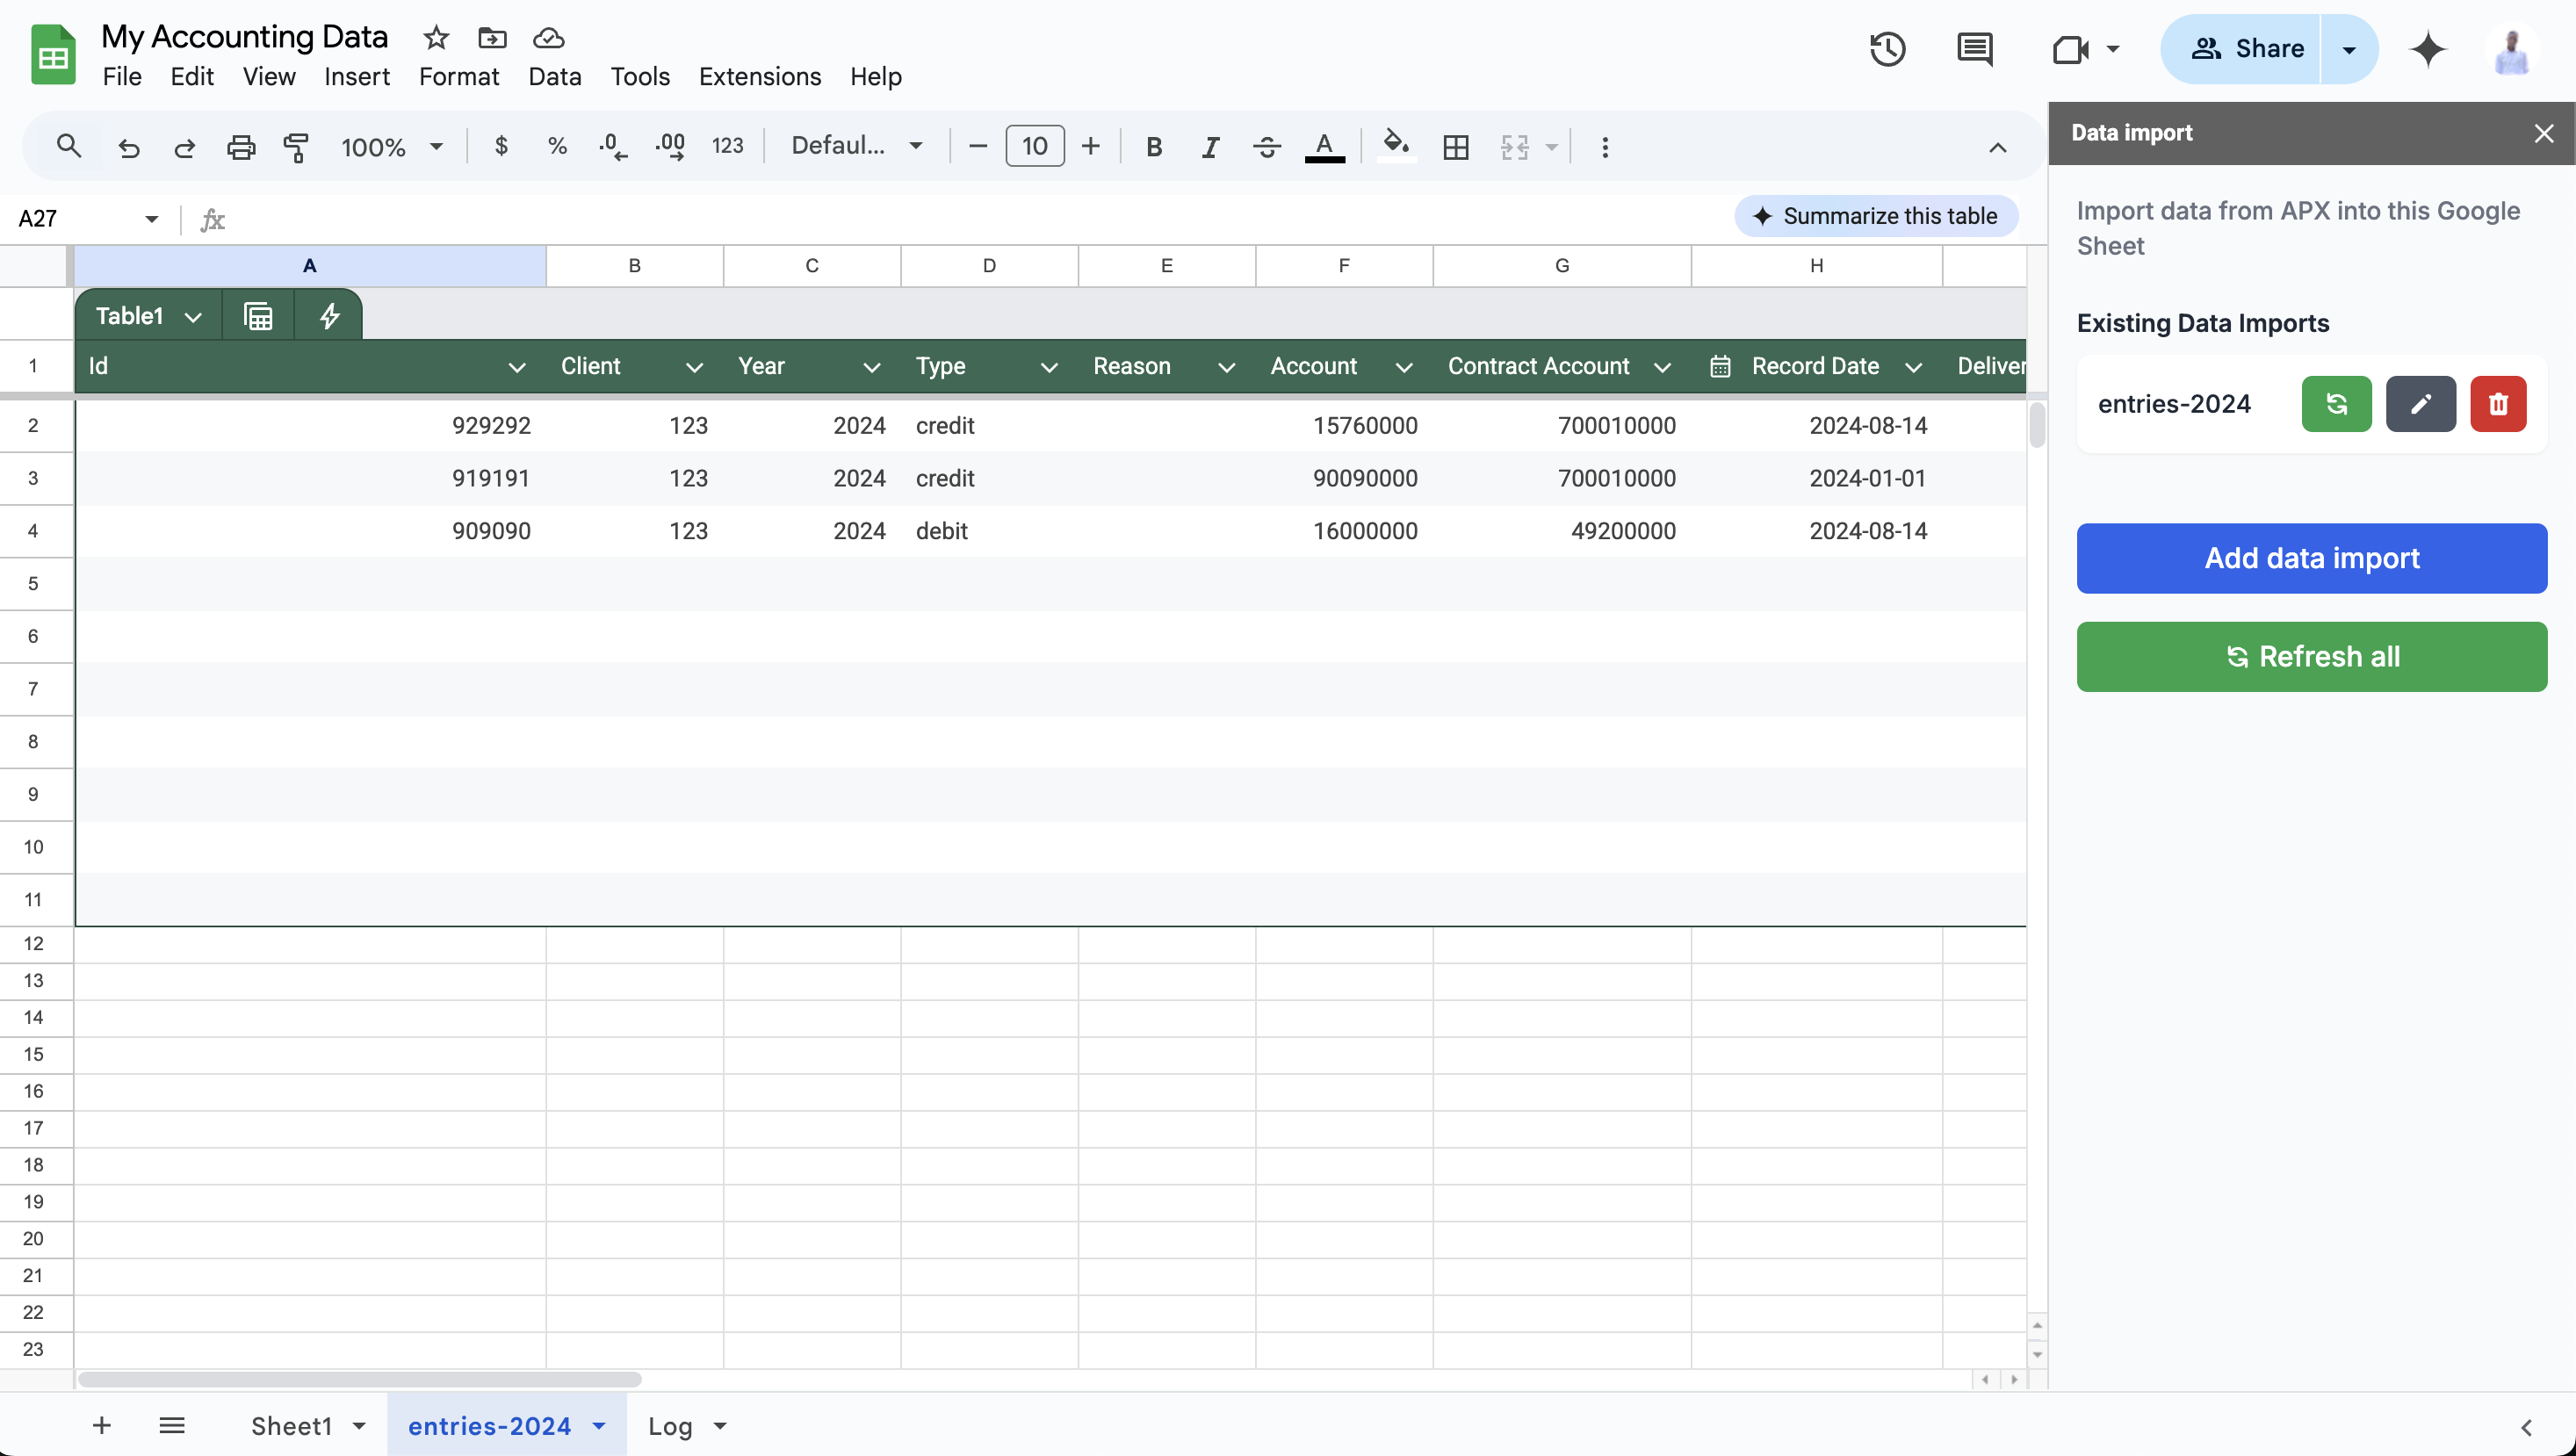
Refresh Behavior
- Data does not update automatically to preserve performance.
- To sync latest data:
- Open the Add-On sidebar
- Click Refresh All
- Confirm in the pop-up
💡 Refresh all button updates all imported tables in the current spreadsheet at once.
💡 To refresh a single sheet click on the refresh icon on the sheet's configuration.
Example Workflow
-
First Import:
- Select
Entries→ Year2024→ Account12345 - Click Submit (creates new sheet "Entries 2024")
- Select
-
Later Refresh:
- Open sidebar in same spreadsheet
- Click Refresh All to update existing sheets
(Image placeholder: Sidebar screenshot highlighting Refresh All button)